“The preview finally showed me how my ears would look; that was the deciding factor.”
ChrisFirst-time buzzer
Upload a clear selfie and see a buzz cut preview that keeps your face, lighting, and background intact, so you can decide fast without shaving or reshooting.
This buzz cut filter focuses on believable head shape, hairline placement, and light consistency so the result looks like a real cut, not a pasted mask. It keeps eyebrows, ears, and skin tone visible, then blends stubble texture into the original lighting and background. The goal is a quick, reliable preview you can use to decide if a close crop fits your face shape and style before you touch clippers.
Try the buzz cut filter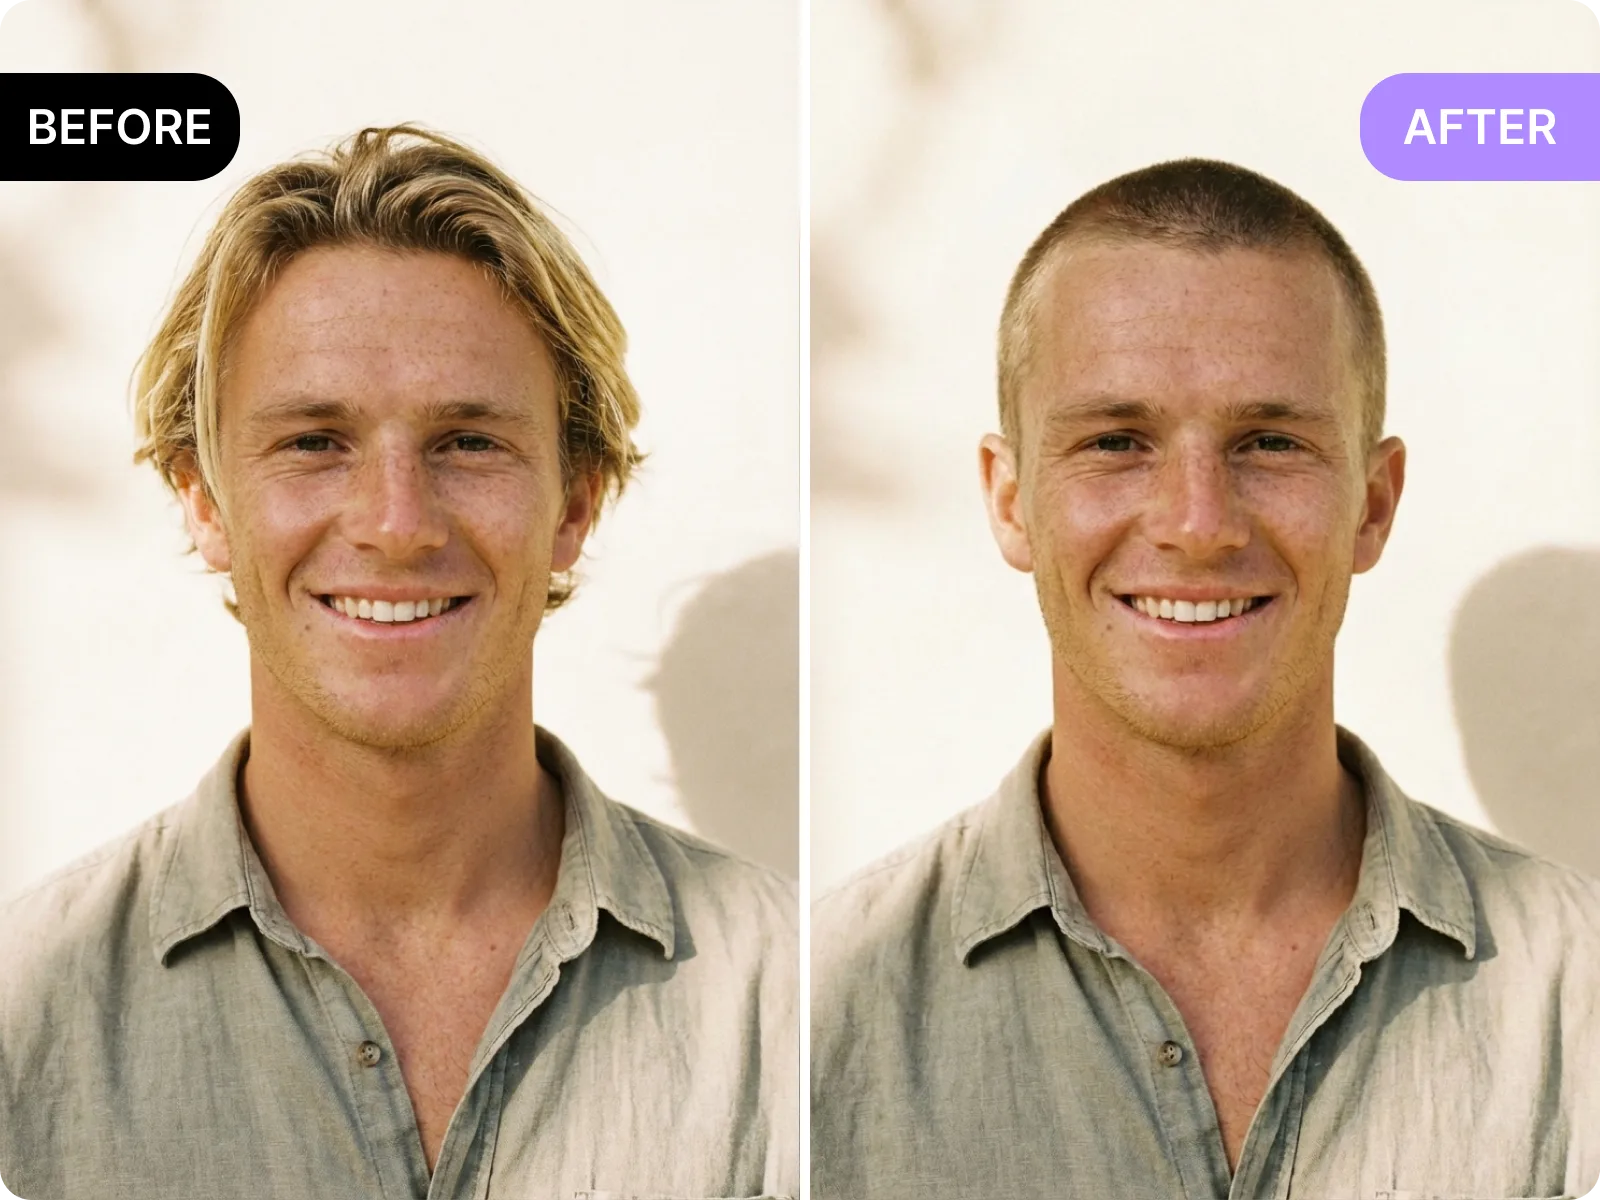
Upload a front-facing photo and the tool checks your forehead, temples, and sideburns to place the buzzed edge where a real clipper line would sit. It keeps eyebrows and ear shape visible, avoids shaving into the forehead, and respects your natural head contour so the preview does not look flat. If your hairline is partially hidden or your head is tilted, it prompts you to adjust the angle to keep the line clean and believable.
Upload a clear selfie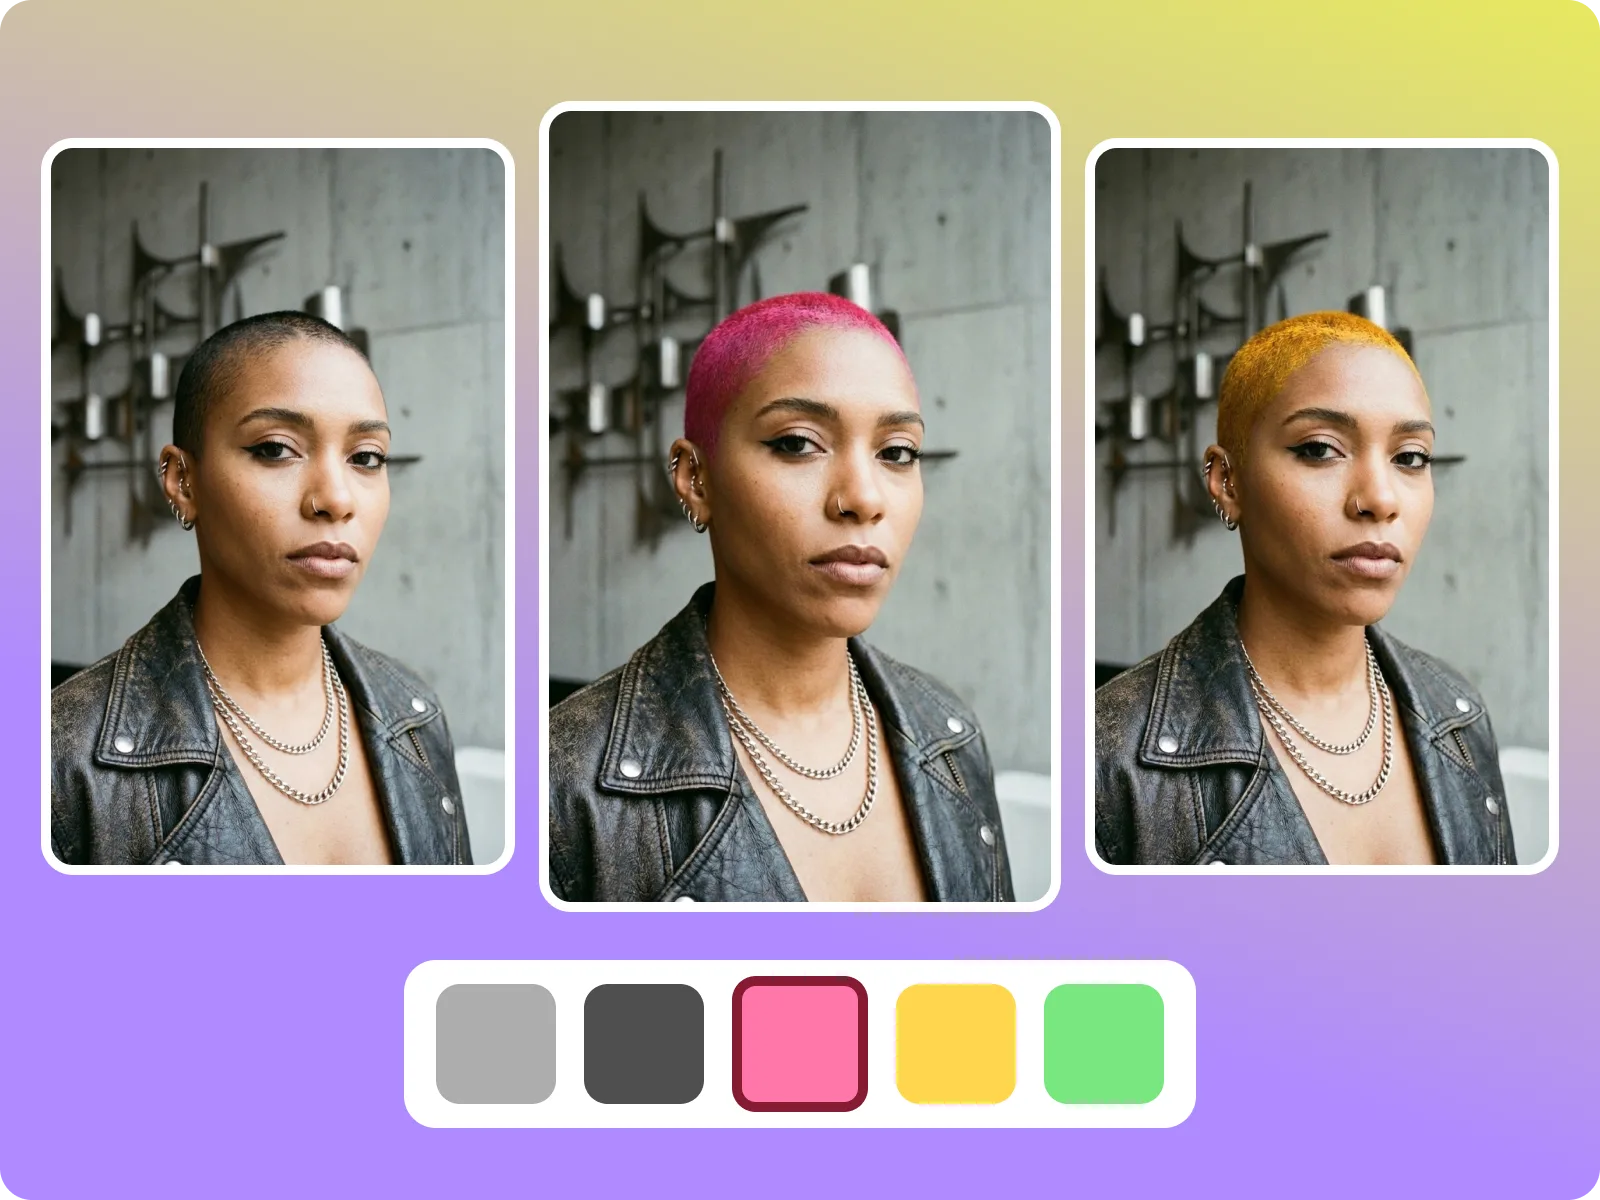
The buzz cut filter matches the light direction and skin tone of your original photo so the buzz texture does not look gray, blown out, or too dark. It keeps shadows along the jawline and neck consistent and avoids covering earrings or glasses frames. This makes the preview useful for profile photos, creator shots, or barber consults where lighting accuracy matters.
See a clean blend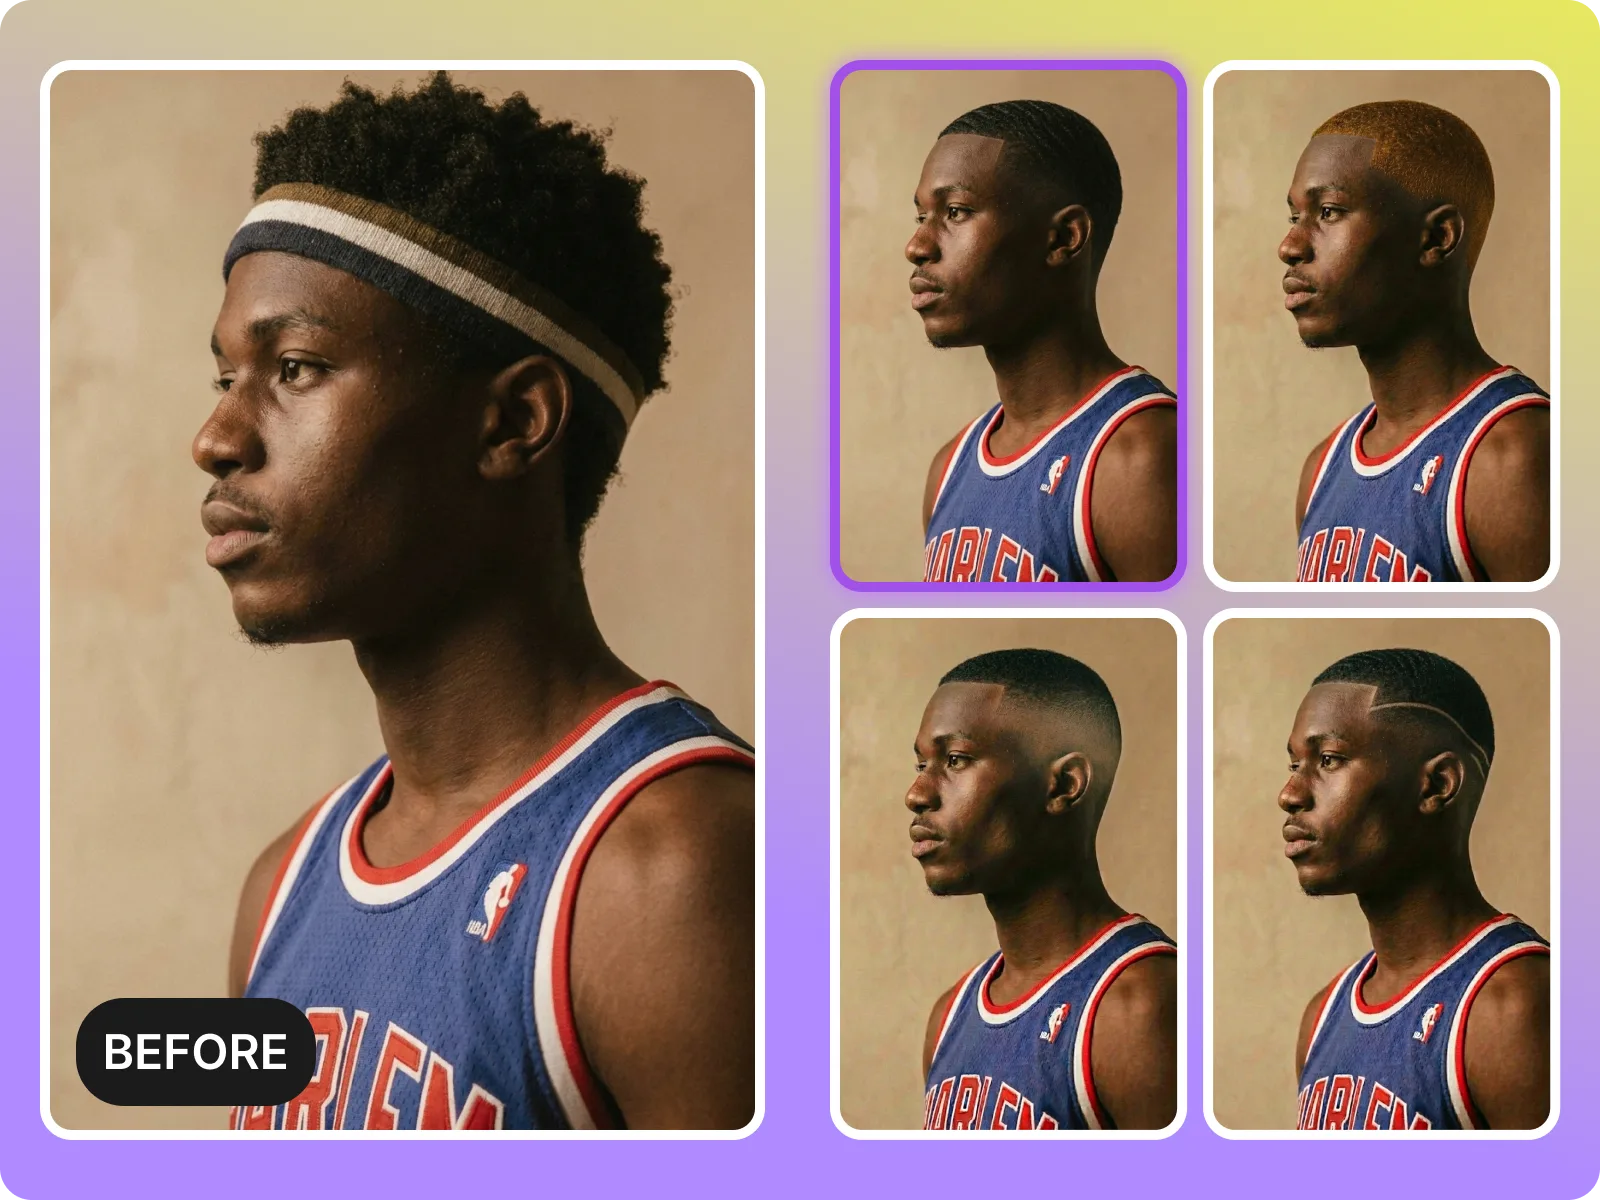
Clean edges are the difference between a helpful preview and a gimmick. This tool preserves jawline and ear edges and avoids fuzzy borders around the scalp. It works best with simple backgrounds and even light, but it still keeps edges tidy on common indoor photos. If the photo is backlit or blurred, it suggests a quick retake so you are judging the cut, not a bad render.
Preview clean edgesPeople search for a buzz cut filter for different reasons: a personal style change, a creator refresh, or a quick check before a barber visit. This section covers the most common scenarios so you can decide if this tool fits your goal and what to look out for. Each use case explains why a buzz cut preview helps and what kind of photo produces the most reliable result.
Start a preview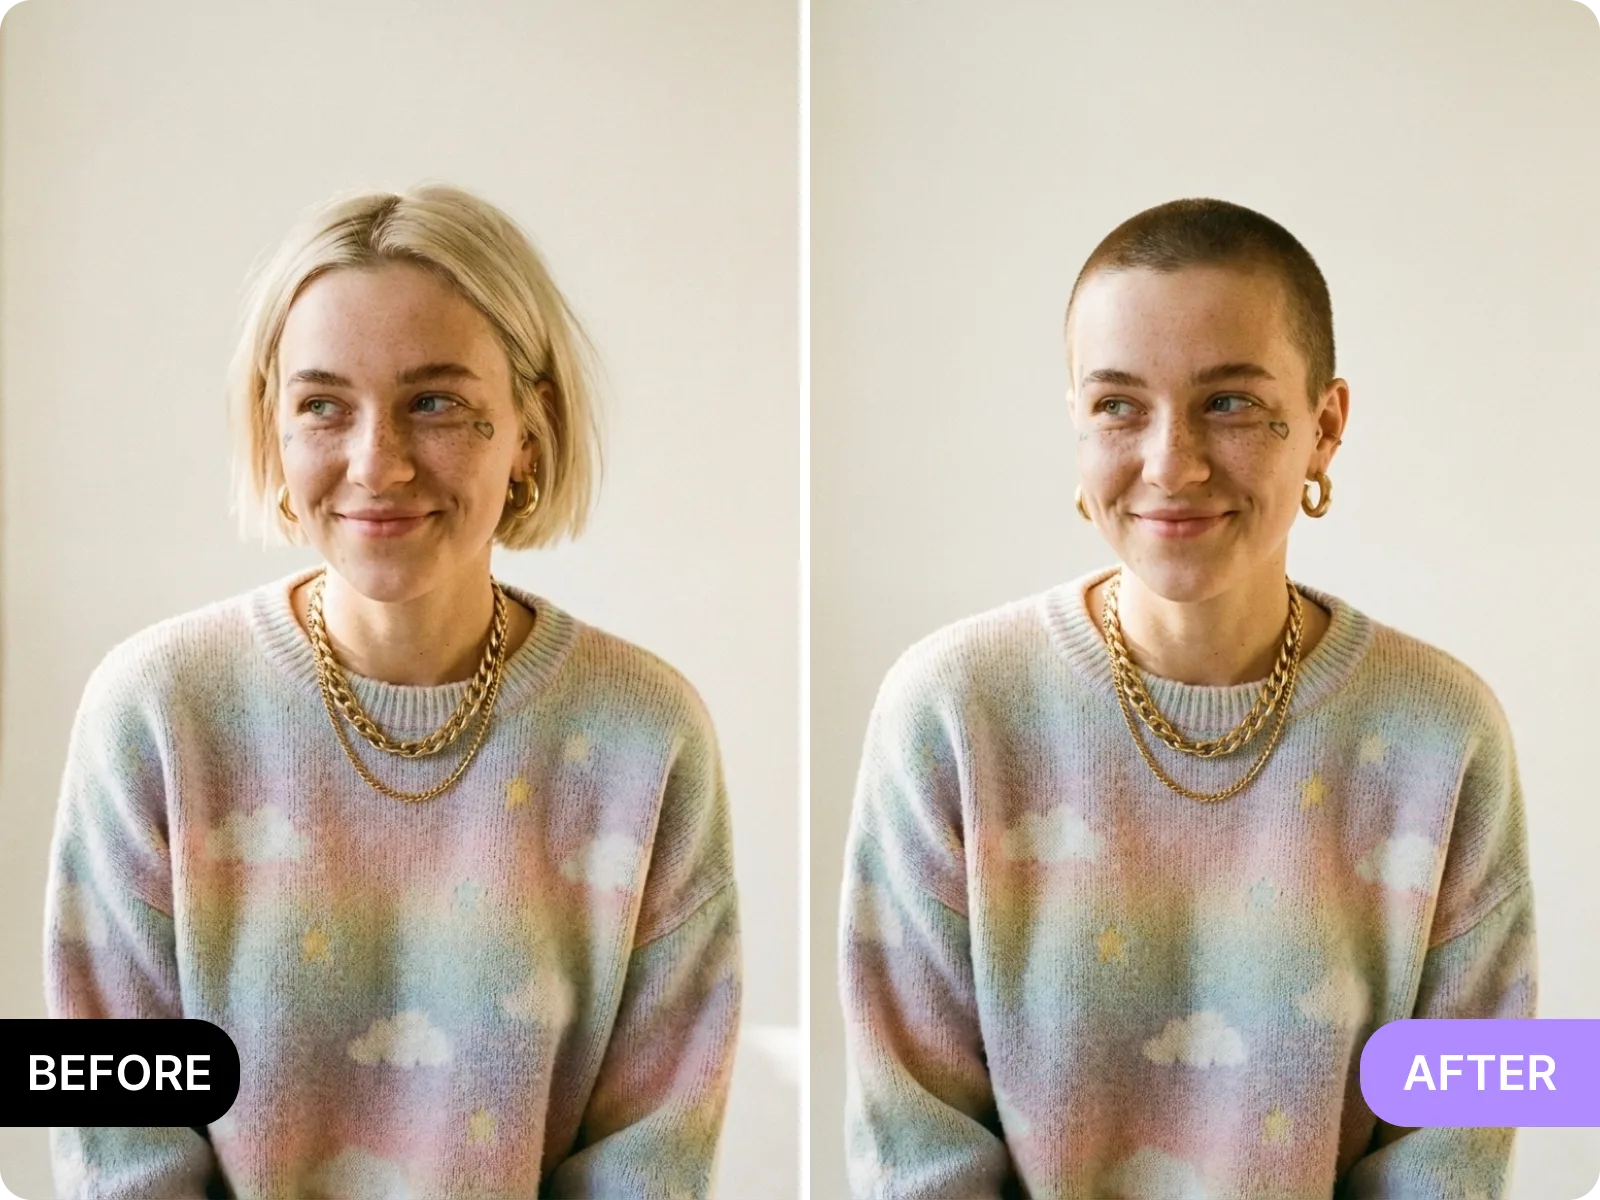
Before you sit in the chair, use the buzz cut filter to check how a close crop frames your face and ears. It helps you judge if a high or low line feels right and whether your head shape suits a very short cut. Bring the before/after to your barber so the conversation starts with a shared target. Avoid heavy filters or hats so the preview reflects the cut, not the accessory.
Share with a barberCreators can test a buzz cut look for thumbnails, profile images, or story polls without shaving. Upload a clean selfie, generate a few variations, and export a before/after for quick audience feedback. This is useful for deciding if a bold look fits your brand. Keep the photo single-person and straight-on so the edges do not clip during rendering.
Run a quick pollIf you need a clean, minimal look for professional profiles or ID-style headshots, the buzz cut filter can help you visualize a simpler silhouette without booking a full reshoot. It keeps facial features clear and reduces visual clutter from hair volume. Use even lighting and a neutral background to avoid shadows that can make the buzz texture look patchy.
Preview a clean lookThis tool is good at clean, front-facing portraits where your full head and hairline are visible, letting it place a realistic clipper line and stubble texture. This tool is NOT ideal for group photos, side profiles, or images with hats, heavy bangs, or strong backlight, because edges and shading become unreliable. Use this section to match the tool to your photo before you judge the result.
Check your photoThe buzz cut filter is most accurate on head-and-shoulders photos with your face centered and your crown fully visible. A straight-on pose helps the tool map your head shape and place the buzz line evenly around temples and ears. This is the most reliable setup for deciding if a close crop suits your facial proportions. If your forehead is covered or the top of your head is cropped out, the preview can look too high or too low.
Use a straight-on photoSide profiles and angled shots hide key reference points like the full hairline and temple edge, which makes the clipper line drift or blur. If you only have profile photos, the result may not match a real buzz cut. For accurate decisions, use a front-facing image first, then compare a side view after the front-facing preview looks right.
Use a front-facing selfieHats, hoodies, large headphones, or thick bangs cover the hairline, which can cause jagged edges or uneven stubble. The buzz cut filter will still try to render, but the result is less trustworthy. Remove headwear, pull hair back, and use even light so the tool sees your full head shape. This is the easiest way to avoid false positives.
Retake without hatsTraditional decision paths include imagining a buzzed look, trying a cap, or searching for similar faces online. A buzz cut filter gives you a direct preview on your own photo, in the same lighting you plan to use for profiles or social content. It reduces the chance of regret, saves time before a barber visit, and gives you a shareable image for feedback so you can decide with confidence.
Preview your own lookA real buzz cut is fast but hard to undo. This preview lets you compare your current look with a close crop before you commit. You can judge how your forehead, jawline, and ears look without hair volume, and decide if a shorter guard or a slightly longer buzz feels right. This removes guesswork and lowers the chance of shaving too short on the first try.
Compare before and afterThe buzz cut filter exports a clean before/after so you can ask friends, partners, or followers for quick input. Sharing a real-looking preview is more useful than describing a cut, and it makes stylist conversations easier. Use the same photo you plan to use online, so the feedback reflects the look people will actually see.
Share a previewInstead of multiple salon visits or repeated reshoots, you can test a buzz cut in seconds and move forward only if it feels right. That means fewer wasted appointments, less time spent debating, and a faster path to a decision. The tool is built for quick use, with no install or signup required.
Try it instantlyUpload a clear, front-facing selfie and get a buzz cut preview that keeps your face shape, skin tone, and lighting intact. The tool maps your hairline and head contour to place a realistic clipper line, then blends a short texture that matches the original photo. Use it to decide if a close crop fits your style before you shave or book a barber appointment.
Try the buzz cut filterA good buzz cut preview keeps eyebrows, ears, and jawline clear so you can judge the cut, not a mask. This tool preserves facial details and keeps the stubble line tight around temples and the crown, avoiding fuzzy borders that make short hair look fake. Use even light and avoid heavy backlight to keep the texture consistent and the edge line sharp.
See clean edgesNot every buzz cut is the same. Use this preview to compare very short, short, and slightly longer buzz looks on the same photo. This helps you decide how much scalp you want to show and how the cut balances your head shape. It is faster than a real test cut and gives you a reference before you tell a barber the length you want.
Compare lengthsWhen the preview looks right, export a clean before/after to show a barber, post a poll, or update a profile image. The buzz cut filter keeps the background and light consistent so the comparison feels real. You can save multiple versions and decide later without uploading again.
Export a previewBuzz cut decisions are quick but hard to reverse. These users rely on realistic previews, clean exports, and clear limits so they can decide without regret and move on quickly.
“The preview finally showed me how my ears would look; that was the deciding factor.”
“It helped me avoid going too short. I picked a slightly longer buzz after seeing it.”
“The clean export saved me a full salon consultation.”
“The preview finally showed me how my ears would look; that was the deciding factor.”
“It helped me avoid going too short. I picked a slightly longer buzz after seeing it.”
“The clean export saved me a full salon consultation.”
“I sent the before/after to my barber and we agreed on the length before I walked in.”
“The edges looked real enough to trust for a profile update.”
“It is fast and honest about bad photos, which saves time.”
“I sent the before/after to my barber and we agreed on the length before I walked in.”
“The edges looked real enough to trust for a profile update.”
“It is fast and honest about bad photos, which saves time.”
“Quick poll on my story and the buzz cut won by a mile. No reshoot needed.”
“I tested it on a headshot and knew right away it was not for me.”
“I could compare short vs almost shaved without touching clippers.”
“Quick poll on my story and the buzz cut won by a mile. No reshoot needed.”
“I tested it on a headshot and knew right away it was not for me.”
“I could compare short vs almost shaved without touching clippers.”
Upload a straight-on selfie
Choose a single-person, front-facing photo with your full head in frame. Use even light and avoid hats, heavy bangs, or strong backlight so the tool can see your hairline and head shape clearly.
Generate the buzz cut preview
The tool maps your forehead, temples, and crown, then blends a short buzz texture into the original photo. If the edges look soft or the hairline is hidden, retake with better light and a clear angle.
Compare lengths and variations
Try shorter and slightly longer buzz looks to see how much scalp shows and how the cut balances your face. Save the version that feels right for your style or lifestyle.
Export and decide
Export a before/after for a barber consult, a profile update, or a quick poll. Use the export as a reference so your final decision matches the preview.
Upload a clear selfie and see a buzz cut preview that keeps your face, lighting, and background intact, so you can decide fast without shaving or reshooting.
Drag & drop Image here